Background
3D printers have been around for a while, and it’s been quite a decade of development since. Some people have moved gradually from open to cube style 3D printers as they are more stiff and rigid, leading to better prints.
Economical wise, it’s better to spent around 3 mil IDR for a stock Ender 3 V2. It’s proven to be reliable enough for hobbyists. For someone who doesn’t want to be involved in the technicalities, Bambu Lab A1 Mini at 4 mil IDR is a premium choice for beginners.
However, although the price seems cheap at a glance, it’s roughly the same as average minimum monthly salary in Indonesia but I digress, the spareparts for both Creality and Bambu Lab printers are expensive.
Therefore, I decided to build my own, I will have experience building 3d printers, a lesson in precision movement systems, which can be used for CNCs the foundation of modern manufacturing, and I would not be afraid to experiment on it as the spare parts are cheaper.
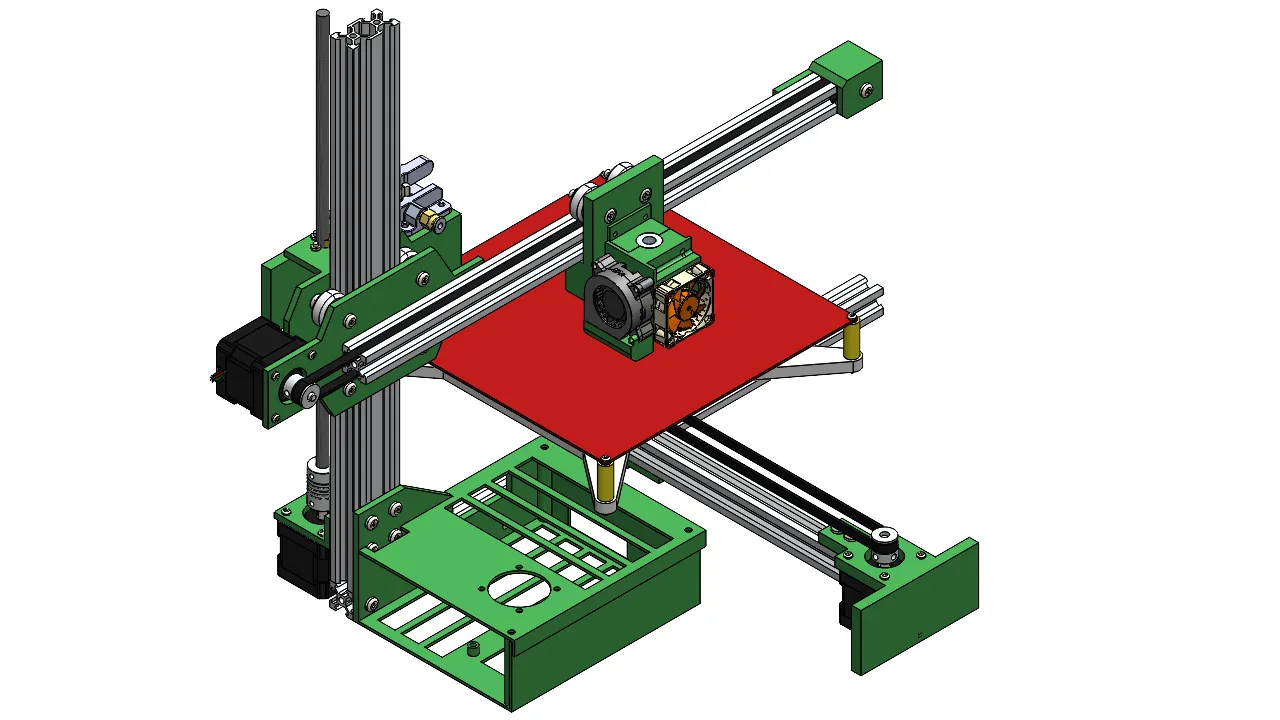
The project started in 2023, and after probably a month of usage, it’s pretty much dead. Here’s the isometric view of the 3D printer:
Lessons learned
As you can see, there are a lot of problems that if I listed them all, it can be thousands of words. Lesson learned nonetheless. Here are some of my thoughts when designing:
The design needs to be cheap as possible around 2 mil IDR to justify building a 3D printer instead of buying a commercial one. This is a big mistake, as it leads me to cutting corners whenever possible.
When I could’ve gone for a standard open style, or just maybe following/copying Ender 3 frame design, I opt for a cantilever style. This also leads to having only 1 piece of 2020 aluminum profile for the y axis installed with tiny PLA+ bracket. This worked for a while and at the end, the X axis gantry sagged and printing accurately becomes impossible.
To add to that, I bought second hand stepper motors as they are 2x cheaper than new ones. I even disassemble and then rebuild almost all of them without thinking anything, which almost leads to one of the stepper motors becomes hard to spin and effectively become junk.
I also used terrible electronics as well, RAMPS 1.4 with MK2B PCB heated bed, the final result is destined to be unreliable and fragile. Even the v-wheels shaft can be visually seen bent because the center distances are off by 1-2 mm and friction increased. I used eccentric nuts to solve the problem, however due to a design mistake, it makes the nuts useless.
The rebuild
After 3 years, I have so many projects that are abandoned. With my masters academic year starting date slowly closing, I’ve decided to come back and rebuild the 3D printer. I might not use all of the brackets, but there’s definitely some parts that I can use.
My masters thesis is about digital twins, and I’ve said it to myself that the prospect of building a digital twin 3D printer would be cool and its more motivation to continue finish this project.
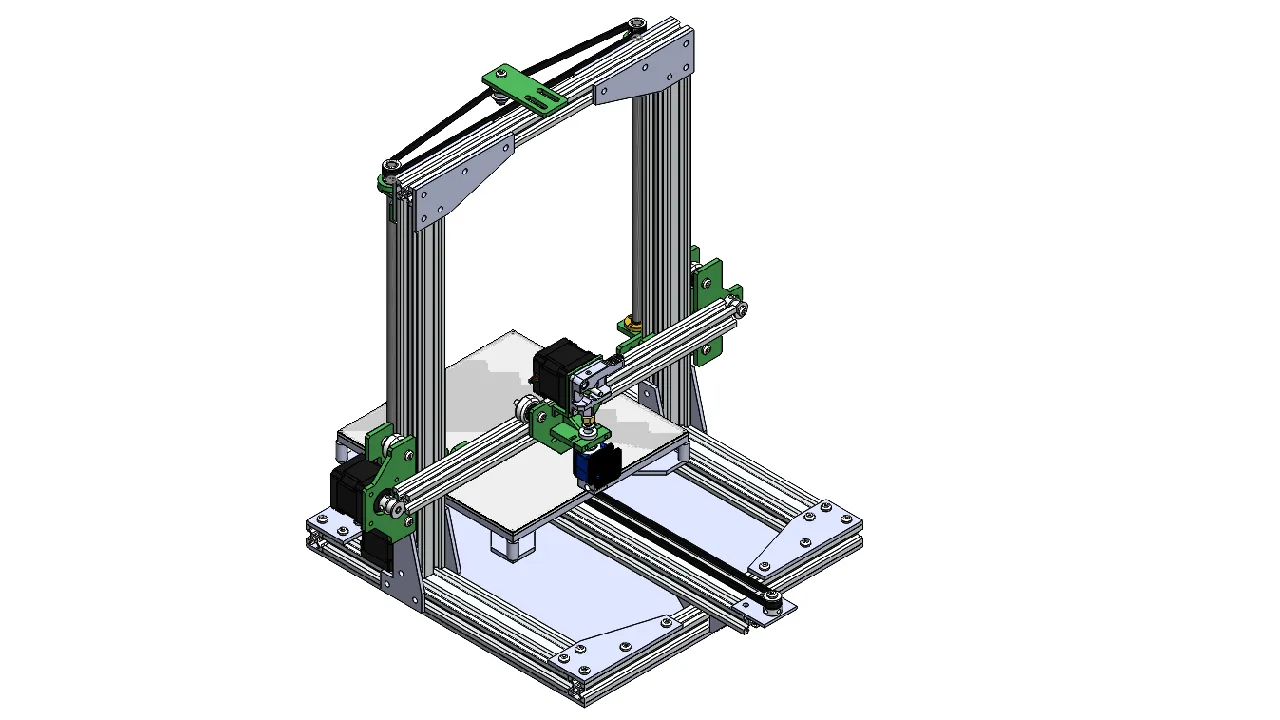
Here’s the isometric view of the new 3D printer design:
To be continued…